If you’re looking to supercharge your Raspberry Pi 5 running Home Assistant, adding an NVMe drive and PoE hat could be a game-changer. While it’s still recommended to boot Home Assistant OS from an SD card, moving your data to an NVMe drive offers better performance and reliability. In this guide, I’ll walk you through the steps to install the Hacker Gadgets NVMe + PoE hat on your Raspberry Pi 5 and migrate your Home Assistant data to the NVMe drive.
Affiliate Disclosure: This post may contain affiliate links, which means I may earn a small commission if you purchase through those links at no extra cost to you. I only recommend products and services I personally use or believe add value. Thank you for supporting AlexTripp.tech!
What You’ll Need
Before we get started, gather the following:
- Raspberry Pi 5
- Hacker Gadgets NVMe + PoE HAT (with included hardware) (not an affiliate link, we just really like it!)
- Compatible NVMe SSD (2230 or 2242 size)
- Four 12mm hexagonal standoffs (included with HAT)
- Four single-headed hexagonal screws (included with HAT)
- PCIe cable (included with the hat)
- Network cable connected to PoE port for PoE power (depending on your needs)
- Official active heatsink for Raspberry Pi 5 (optional)
- A Home Assistant installation already running on your Raspberry Pi
Step-by-Step Guide
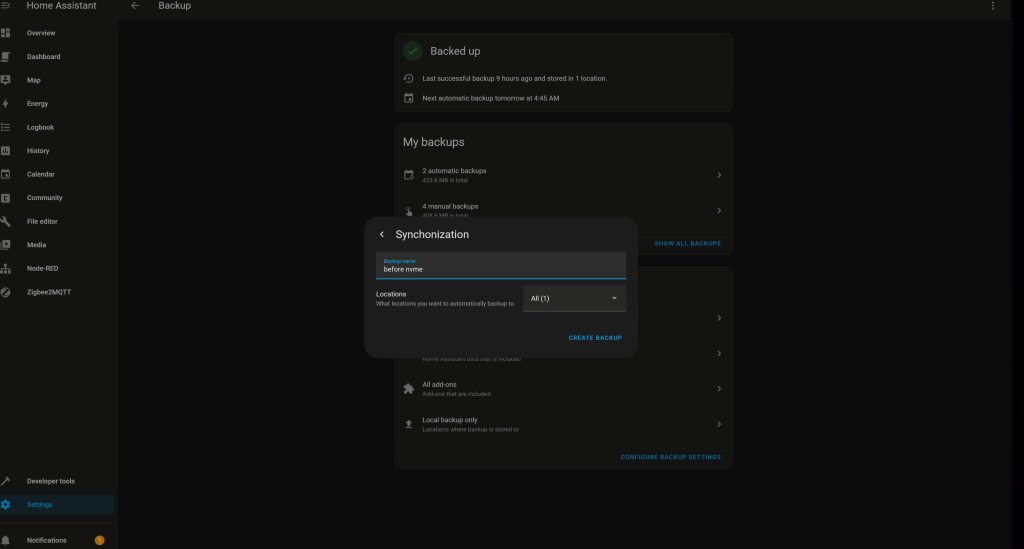
Step 1: Back Up Your Home Assistant Installation
Before making any changes, it’s essential to back up your Home Assistant instance.
- Open your Home Assistant dashboard.
- Navigate to Settings > System > Backups.
- Select “Back Up Now” to create and then download the backup file to your computer.
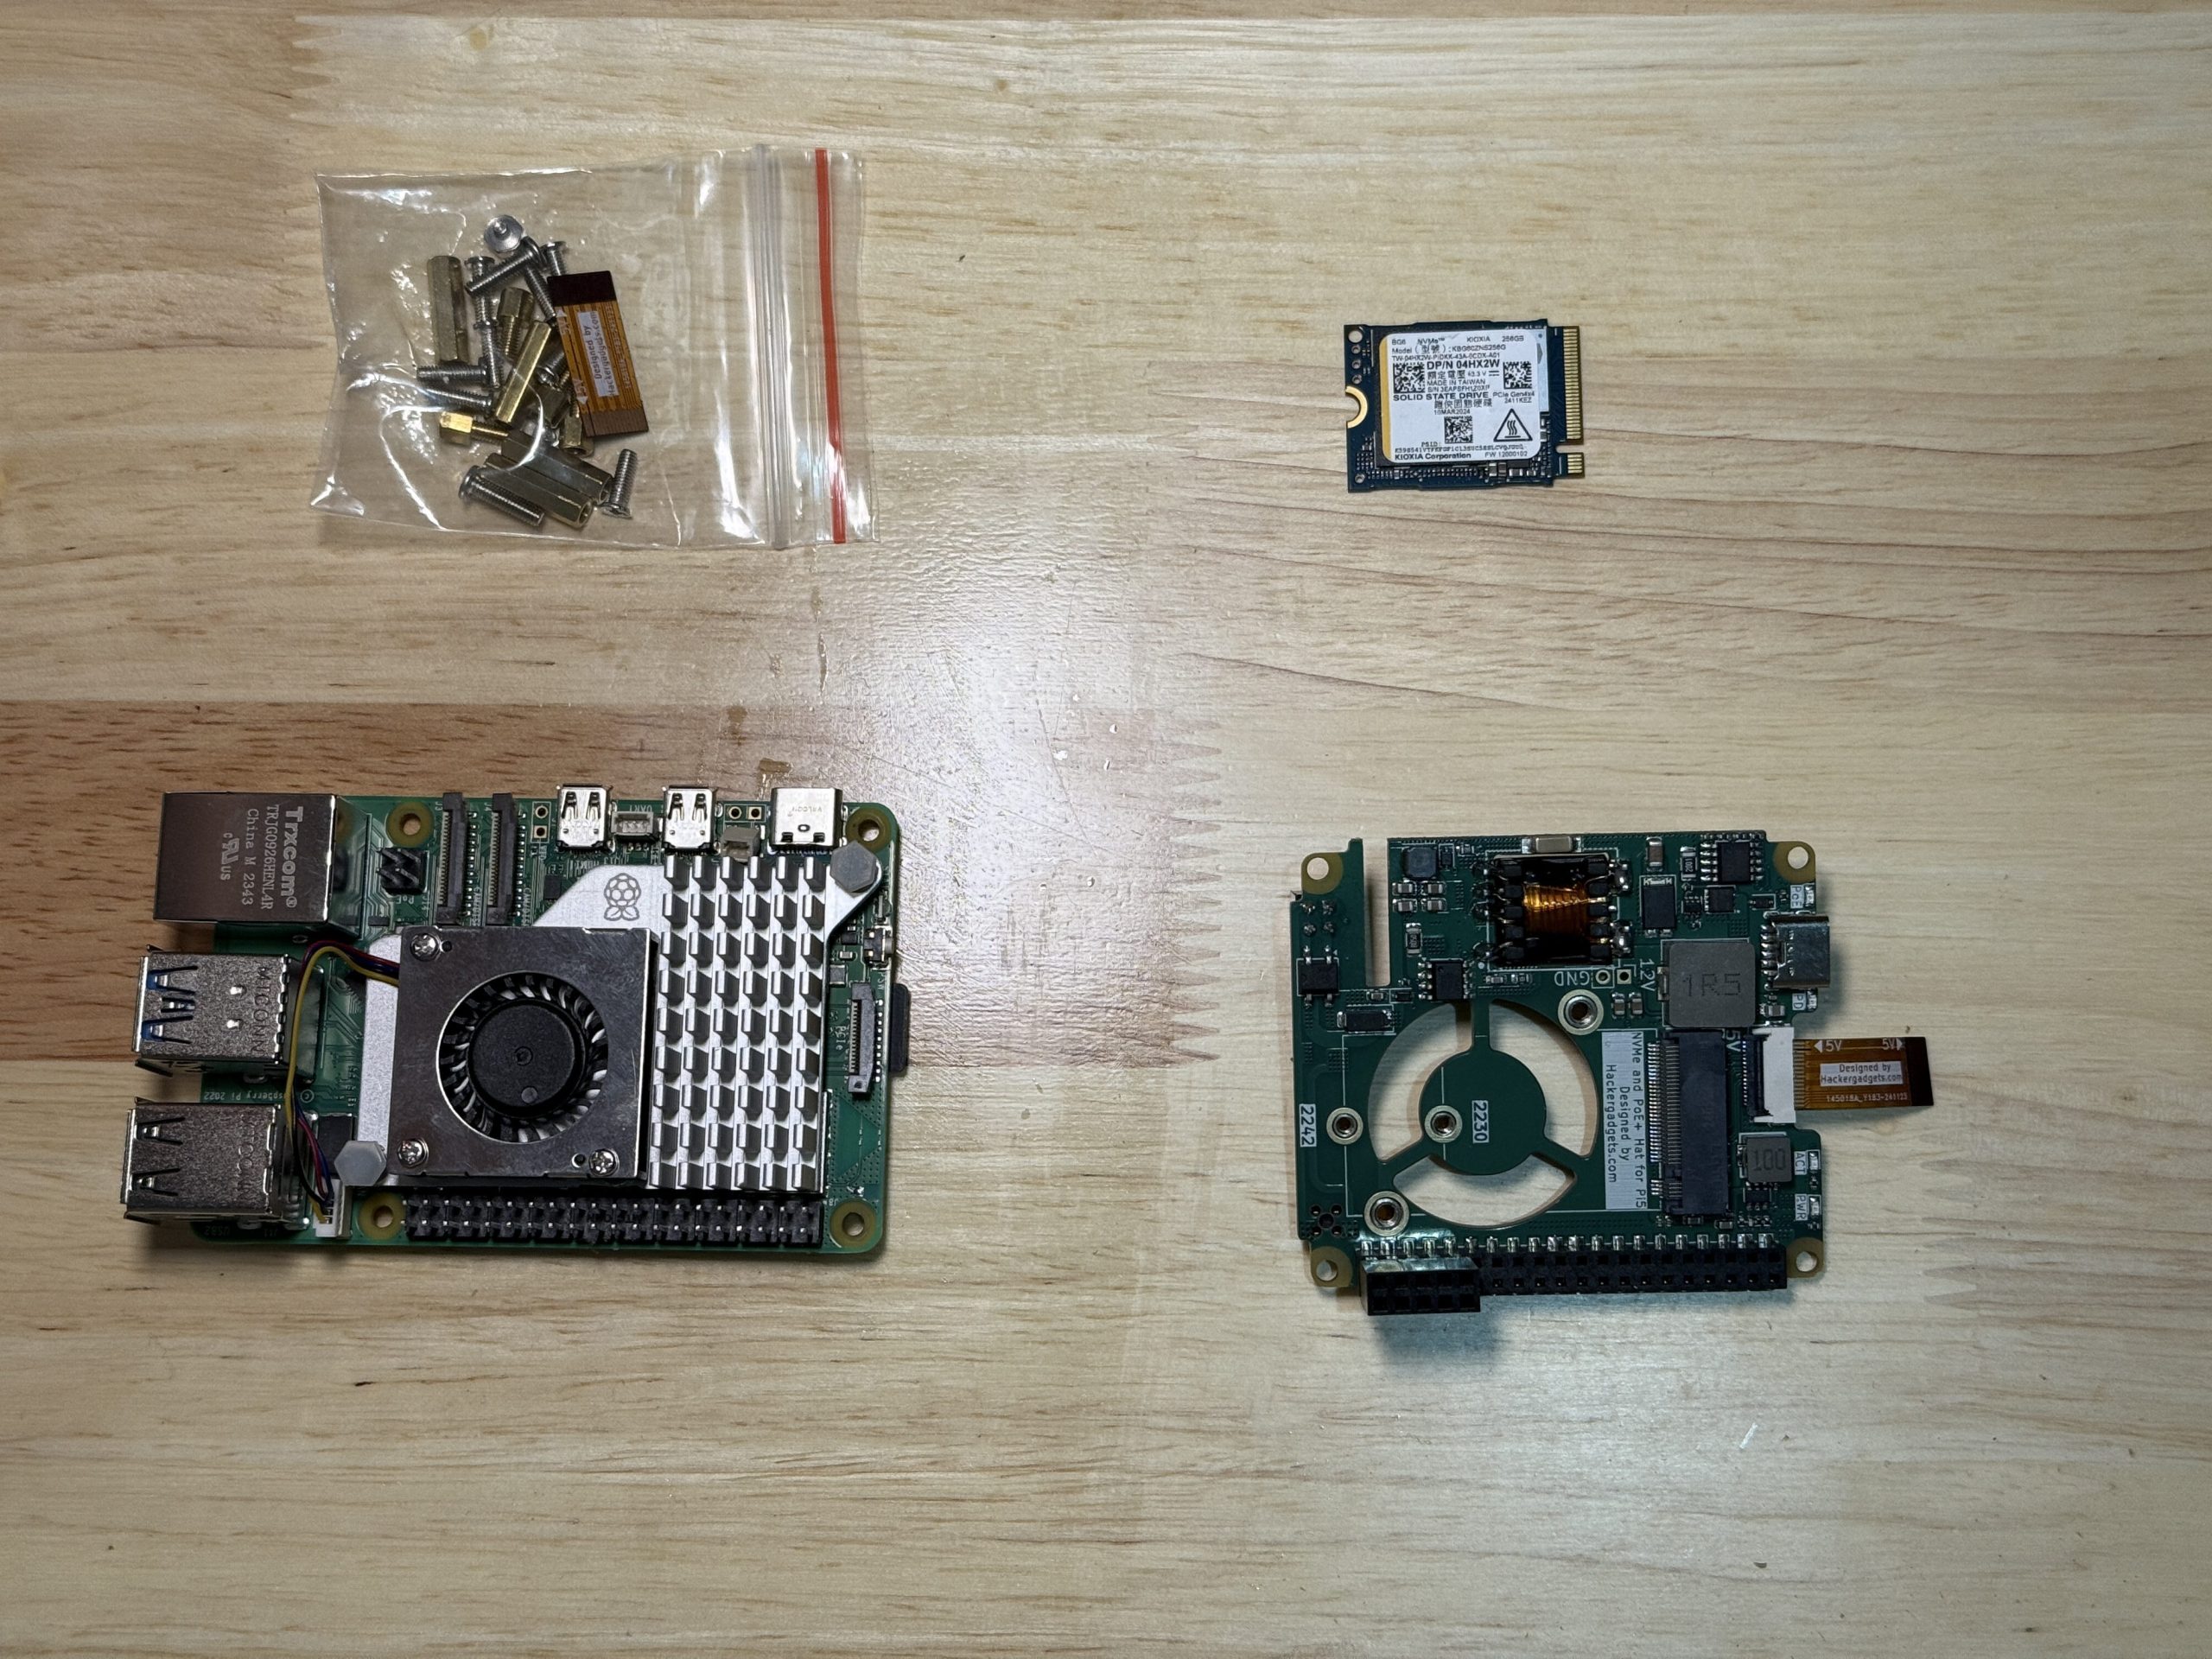
Step 2: Power Down and Gather Supplies
- Shut down your Raspberry Pi.
- Disconnect the power and any attached cables.
- Gather your Hacker Gadgets PoE + NVMe hat, included hardware, and a compatible NVMe SSD. If you have the official active heatsink for the Raspberry Pi 5, have that ready too.
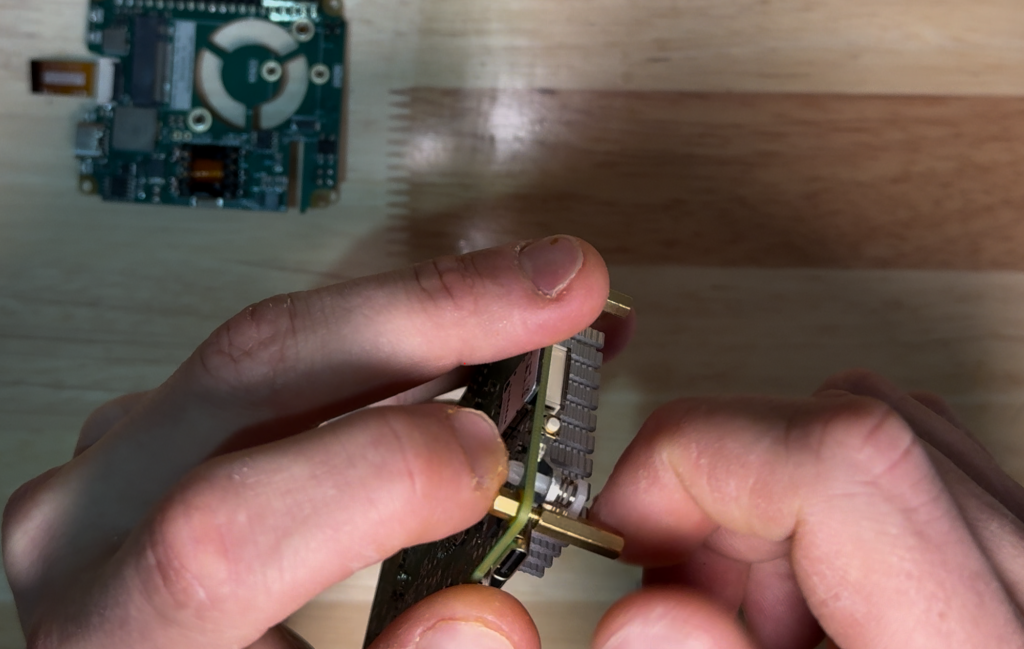
Step 3: Install the Standoffs and Heatsink
- Attach the four 12mm hexagonal standoffs to the mounting holes on your Raspberry Pi 5.
- Use the included screws to secure them.
- If you’re using the official active heatsink, install it at this stage for better cooling performance.
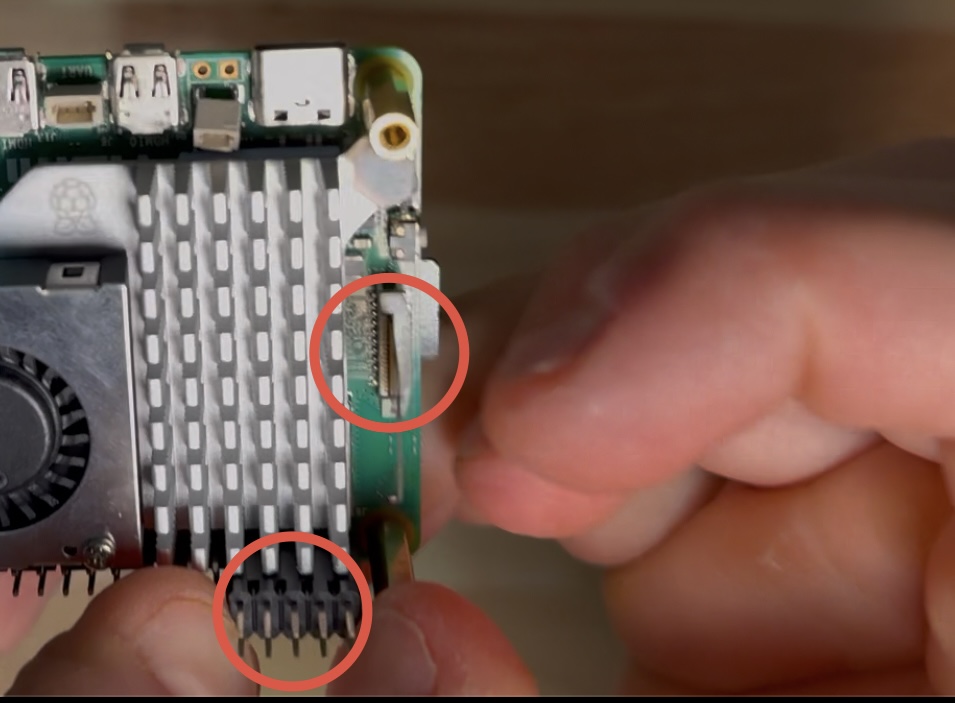
Step 4: Connect the PCIe Cable and Power Header
- Connect the PCIe cable to the Raspberry Pi. Ensure the gold fingers face the center of the board.
- Align the power header with the first pin of the GPIO header and secure it in place.
Step 5: Attach the NVMe + PoE Expansion Board
- Plug the PoE NVMe expansion board onto the Raspberry Pi.
- Double-check that the power header aligns with the first pin of the expansion board.
Step 6: Secure the Expansion Board and PCIe Cable
- Use the four 8mm screws to secure the top of the expansion board.
- Flip up the black fixing tab on the PCIe cable socket, insert the cable, and press the tab back down to lock it in place.
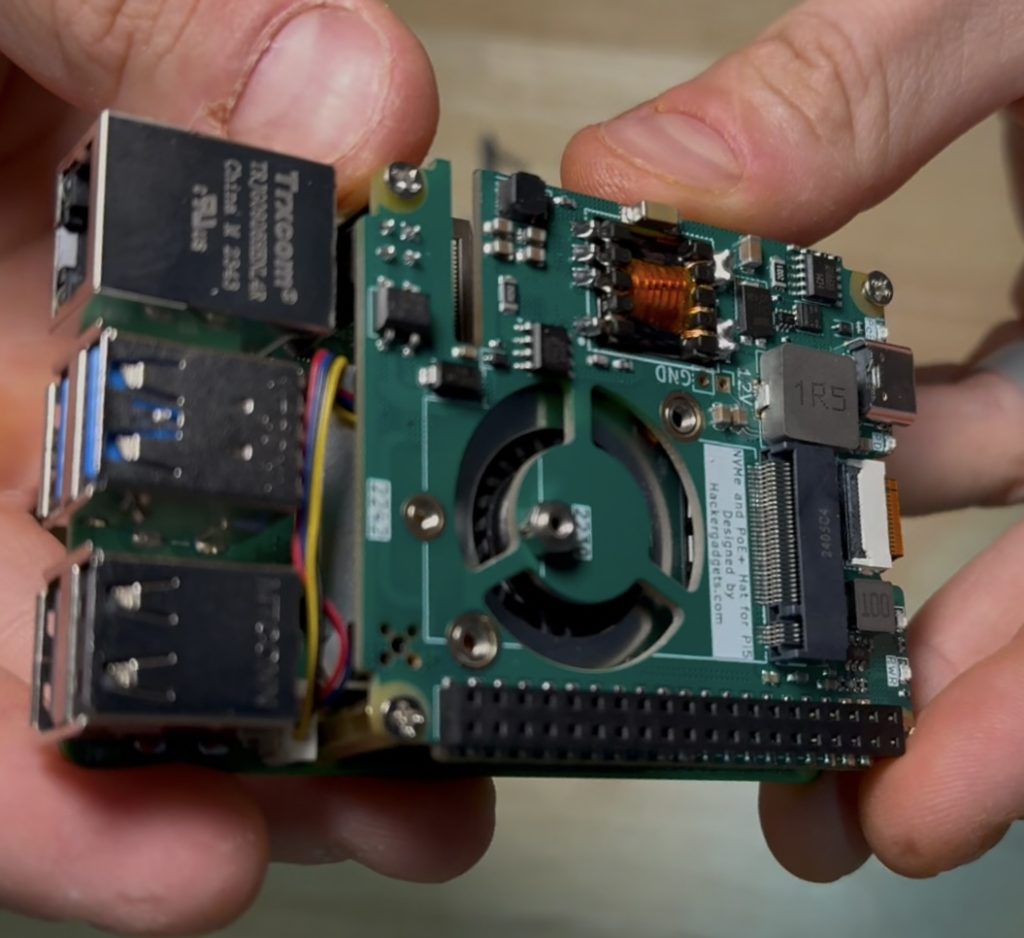
Step 7: Mount the NVMe Drive
- Attach the SSD standoffs to the expansion board, adjusting their positions for your SSD size (2230 or 2242).
- Insert the NVMe SSD into the slot and secure it with the included screw.
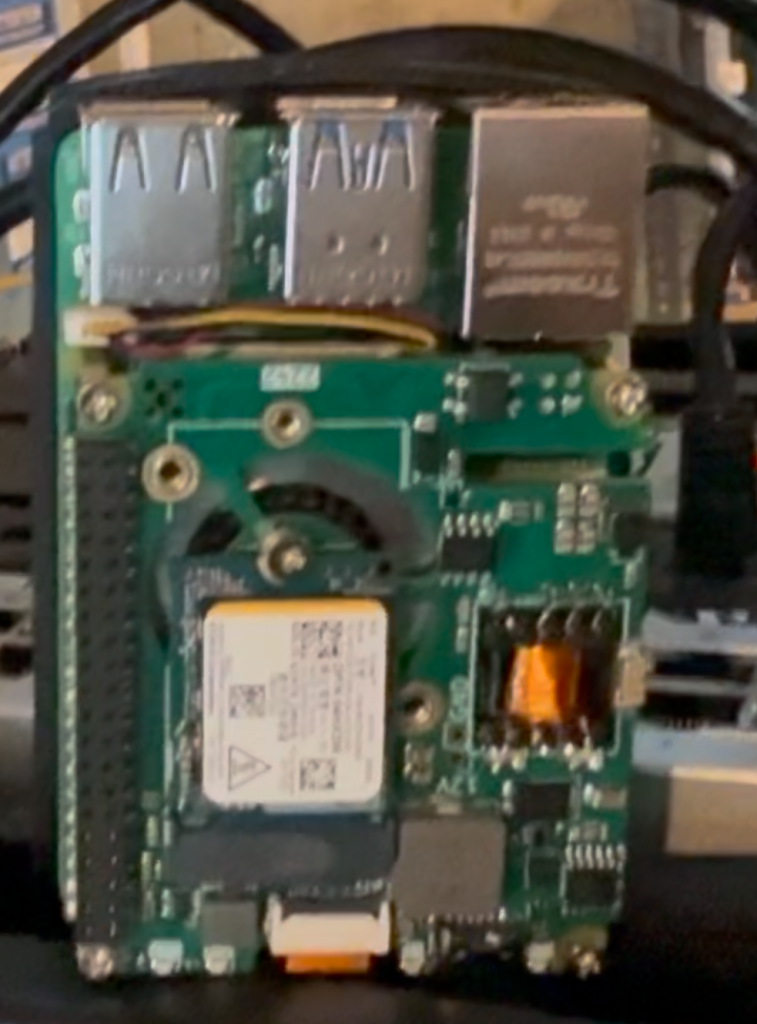
Step 8: Reinstall and Power Up
- Place your Raspberry Pi back in its rack or designated location.
- Connect the PoE network cable or power adapter.
- Power on the Raspberry Pi and wait for it to boot.
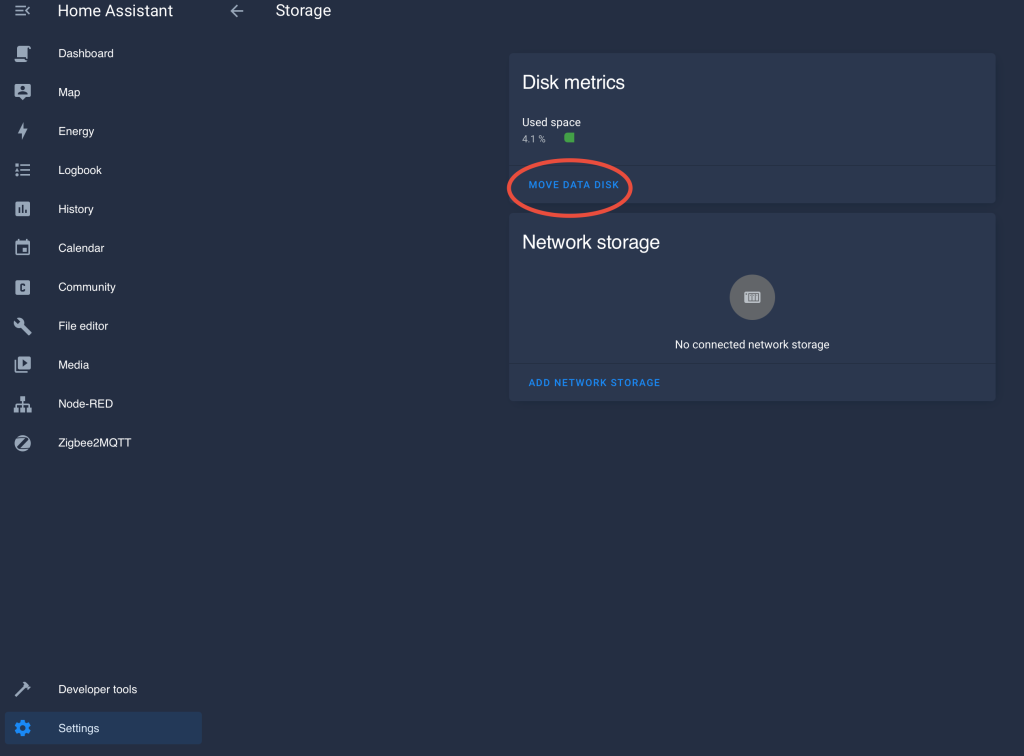
Step 9: Migrate Home Assistant Data to the NVMe Drive
- Log in to your Home Assistant interface.
- Go to Settings > System > Storage.
- Click Move Data Disk and select your NVMe drive.
- Confirm the process. Your Home Assistant instance will go offline for about 10 minutes while the data is transferred.
- Once the migration is complete, your Home Assistant data will be running on the NVMe drive!
Why Upgrade to NVMe Storage?
Using an NVMe drive for Home Assistant improves read/write speeds, enhances reliability, and can handle larger amounts of data compared to microSD cards. Combined with the PoE functionality, this setup streamlines both power and data connections, making it an ideal choice for advanced smart home enthusiasts.
Final Thoughts
With the NVMe + PoE hat installed and configured, your Raspberry Pi 5 is now optimized for running Home Assistant. Enjoy the improved performance and reliability of your smart home setup. If you found this guide helpful, check out more home automation tutorials on AlexTripp.tech and subscribe to the YouTube channel for video tutorials!
[…] I used the following POE + NVME hat in my setup: Hacker Gadgets NVMe + POE Hat. […]