Master your smart home with these essential home assistant setup tips for beginners. Secure, organize, and optimize!
Affiliate Disclosure: This post may contain affiliate links, which means I may earn a small commission if you purchase through those links at no extra cost to you. I only recommend products and services I personally use or believe add value. Thank you for supporting AlexTripp.tech!
Introduction
Why Setting up Home Assistant Right the First Time Matters
Getting your Home Assistant up and running correctly from the get-go is super important for a hassle-free, secure, and smooth smart home setup. Imagine not having to deal with mysterious glitches, knowing your gadgets (and your privacy) are in safe hands, and being able to tweak or add to your setup without hassle. Starting with these Home Assistant setup tips can make the whole thing feel a lot more manageable and future-proof.
What You’ll Find in This Guide
This guide is your roadmap through your first time getting Home Assistant up and running. We’re talking everything from picking out the best gadgets to slotting Home Assistant into place, pulling up the drawbridge on security, creating out your dashboard, and having a solid backup plan. Let’s roll up our sleeves and get into:
- Pick the Perfect Hardware for Your Setup
- Weighing up your options: Raspberry Pi, Dedicated Server, Home Assistant Green.
- SD Cards vs SSDs in a Raspberry Pi.
- Home Assistant Installation
- Best ways to install: Home Assistant OS, Container, Supervised.
- What to fiddle with first after you install.
- Lockdown Your Home Assistant Setup
- Getting two-factor authentication up and running.
- Safe street-side access options: Nabu Casa, DuckDNS.
- Good ideas for user accounts and permissions.
- Design Your Dashboard for Maximum Usability
- Setting up Lovelace UI.
- How to tidy up your features and using views.
- Throwing in custom cards to make it your own.
- Backup and Restore, Just in Case
- Why should you back up?
- How to set it up on autopilot.
- What to do if things go wrong and you need a restore.
- Parting Wisdom
- Key setup pointers.
- A little nudge to keep the curiosity wheels turning and fine-tuning your setup.
Choose the Right Hardware for Your Home Assistant Setup
Picking the right gear for your Home Assistant is sometimes more about what you have or what you’re used to vs buying the best. Let’s weigh the ups and downs of the big players:
Raspberry Pi vs. Dedicated Server vs. Home Assistant Green
| Hardware Option | Pros | Cons |
|---|---|---|
| Raspberry Pi | Cheap, energy efficient, simple to set up | Not the fastest on the list, could wear out the SD card although I’ve not run into that |
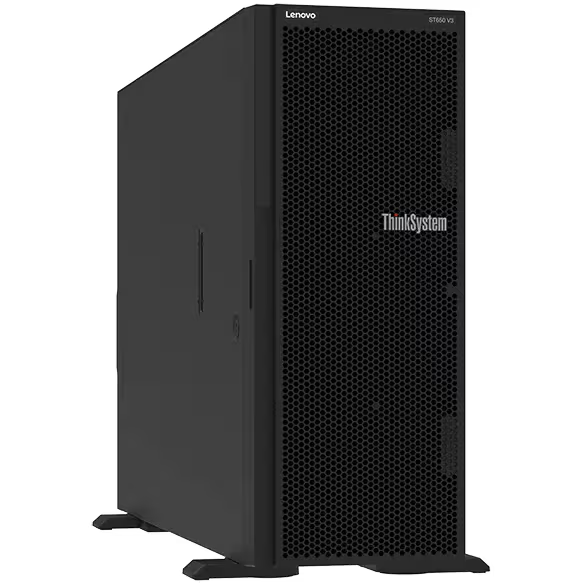
| Dedicated Server | Big performance, can do more than just Home Assistant | Pricey, power hog |
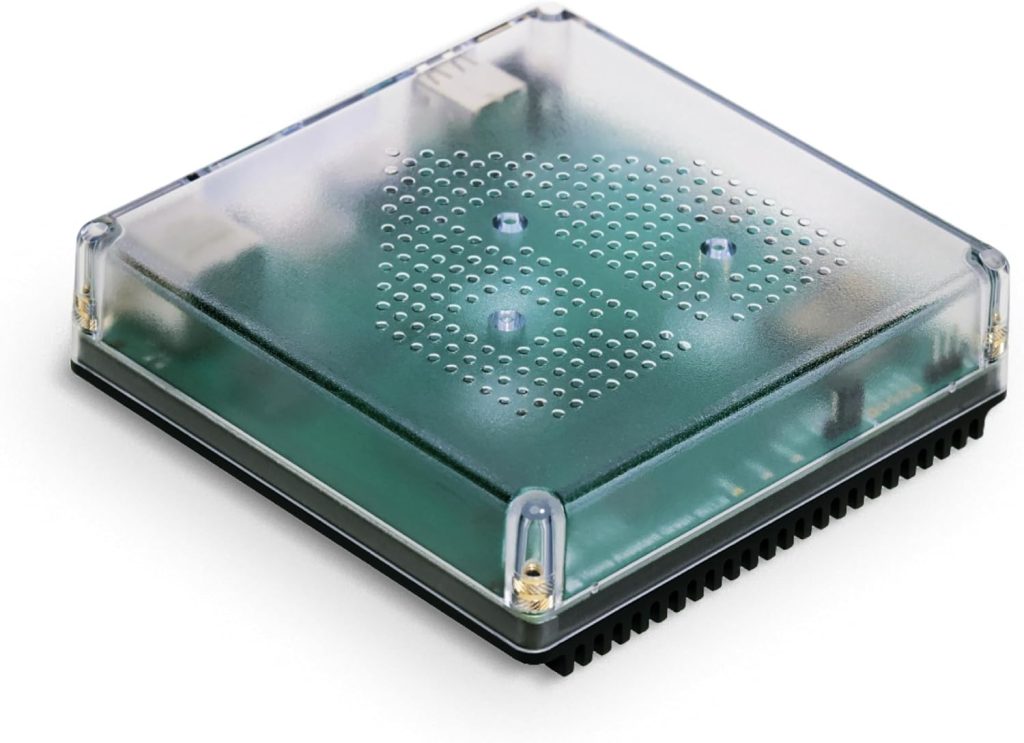
| Home Assistant Green | Home Assistant ready to go | Does not connect some devices out of the box |
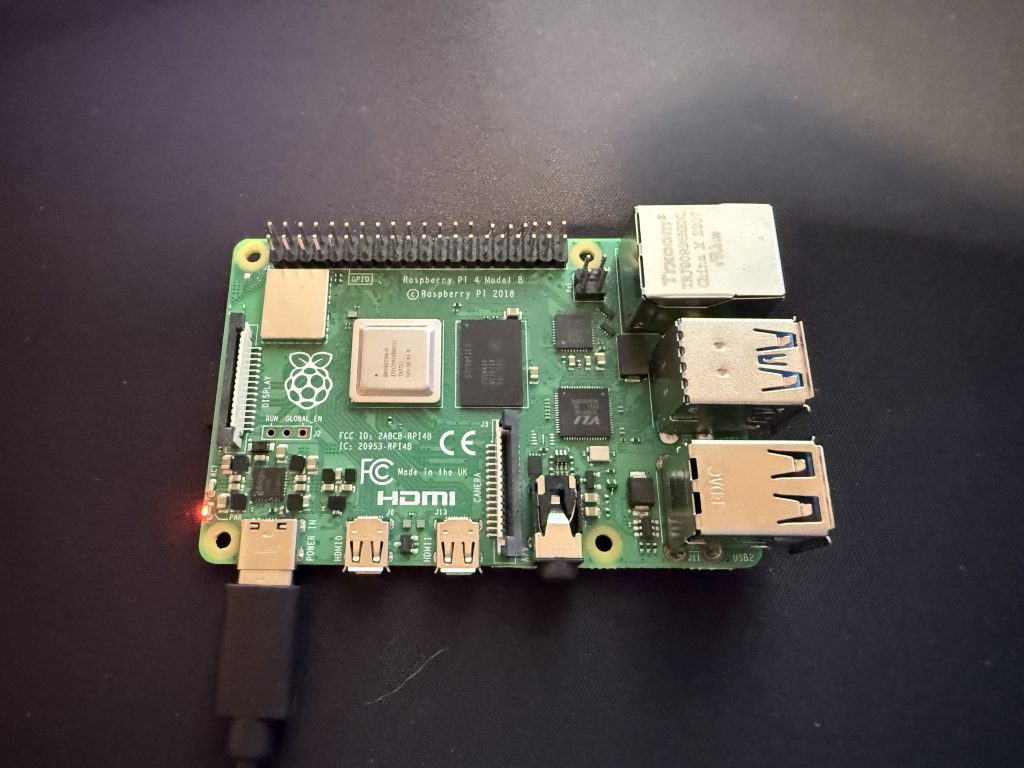
Raspberry Pi: A go-to for newbies because it’s easy on your wallet and even easier to get going. I kicked things off with a Pi, and it’s a solid intro to Home Assistant. Just watch out for its low(er) horsepower and the SD card could get worn out (consider an SSD upgrade).
Dedicated Server: I’ve also gone this route in the past. I got a free server that work was going to throw away and was able to get HA setup on it. I was also able to host a lot of other open source apps on it, but when I moved I decided to head back to a Raspberry Pi. I would go this route if you want to do more than just HA, just watch out on that electricity bill!
Home Assistant Green: This costs a tad more than a Pi setup but is essentially ready to go out of the box. You will need to add a dongle or two to support the main types of communications protocols but it’s a quick start for someone who is not techy enough to get a Pi going.
Benefits of using an SSD over an SD card
Trading out that old SD card for an SSD could seriously boost your Home Assistant system’s reliability and speed.
Advantages of SSDs:
- Lasts Longer: SSDs can handle more data writing than SD cards, which means they stick around for longer.
- Faster: Fast read and write times make your system boot quick as a flash and feel more snappy.
- Trustworthy: Less likely to end up with corrupted data, saving you some headaches.
Why SSD is better: Making the jump to an SSD was an easy and worth it upgrade. I noticed some extra speed in navigation and feel a little better about writing more data with more sensors.
| Storage Type | Avg. Read Speed (MB/s) | Avg. Write Speed (MB/s) | Avg. Lifespan (TBW – Terabytes Written) |
|---|---|---|---|
| SD Card | 10 – 100 | 10 – 50 | 50 – 200 |
| SSD | 200 – 3500 | 200 – 3000 | 150 – 600+ |
Source: Data compiled from different hardware companies.
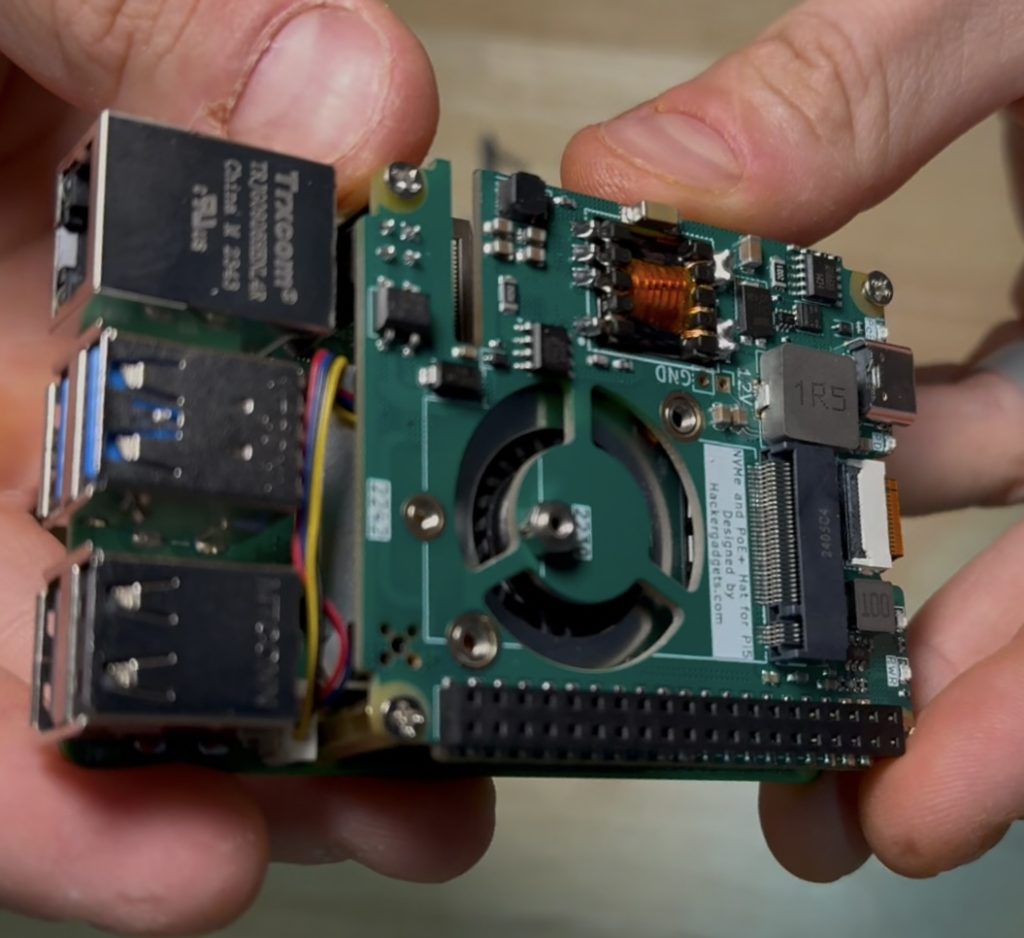
I used the following POE + NVME hat in my setup: Hacker Gadgets NVMe + POE Hat.
Install Home Assistant the Right Way
Setting up Home Assistant right is key for a smooth experience. I’ll walk you through the best ways to get it up and running so everything works like a charm.
Ways to Install (Home Assistant OS vs. Container vs. Supervised)
There’s a handful of ways to get Home Assistant onto your system, and each one comes with its own perks. Here’s a quick guide:
| Method | What It’s Like | Perks | Who’s It For |
|---|---|---|---|
| Home Assistant OS | It’s a whole operating system made just for Home Assistant. | Easy to install. | Newbies or folks who like things plug-and-play. |
| Home Assistant Container | It runs in Docker containers. | Super flexible, light, and loves to share space with other Docker stuff. | Tech-savvy folks comfy with Docker. |
| Home Assistant Supervised | Plops Home Assistant onto an existing OS, with all the supervisor goodies. | Full reign over the OS and easy add-on handling. | Geeks who want both OS control and laid-back add-on management. |
Pick what floats your boat. If you’re new to the scene, I’d say go for Home Assistant OS.
First Steps Once You’ve Installed
Once you’re set up, here’s what you need to do next:
- Create Your Account: First time firing it up? You’ll need to set up an account. Use a strong, fool-proof password to keep things locked down tight (Home Assistant Community).
- Sort Out Your Location and Clock: You’ll need to set your home spot and time zone. This helps Home Assistant give you the right data and hands-free control based on your local time.
- Add Your Gadgets: Loads of devices can hook up to Home Assistant. Head to “Integrations” in the dashboard to start adding things like lights and thermostats. For those who love tinkering, take a look at the configuration.yaml file.
- Ramp Up Security with MFA: Slap on Multi-Factor Authentication to bump up security (Home Assistant Community). Go to “Users” in “Configuration” and set MFA up for each person.
- Safe Remote Access: Want to check your setup on the go? You’ve got two big options: Nabu Casa and DuckDNS.
- Nabu Casa: Pay a bit and get safe, quick access with minimal hassle.
- DuckDNS: It’s free but more hands-on, using Let’s Encrypt for certifications. Check out the DuckDNS site for the scoop on setting it up.
- Back It Up: Before you go tweaking and personalizing, get a backup in place. Home Assistant has an easy back up tool under Settings, System, Backup.
Tackle these first steps, and you’re on your way to a killer Home Assistant setup. Keep digging into it to make it just right for you. And if you hit a snag, check out our section on troubleshooting common issues.
Secure Your Home Assistant Instance
Protecting your Home Assistant hub is as important as locking your front door. Here are some key tips to keep your setup tight and secure.
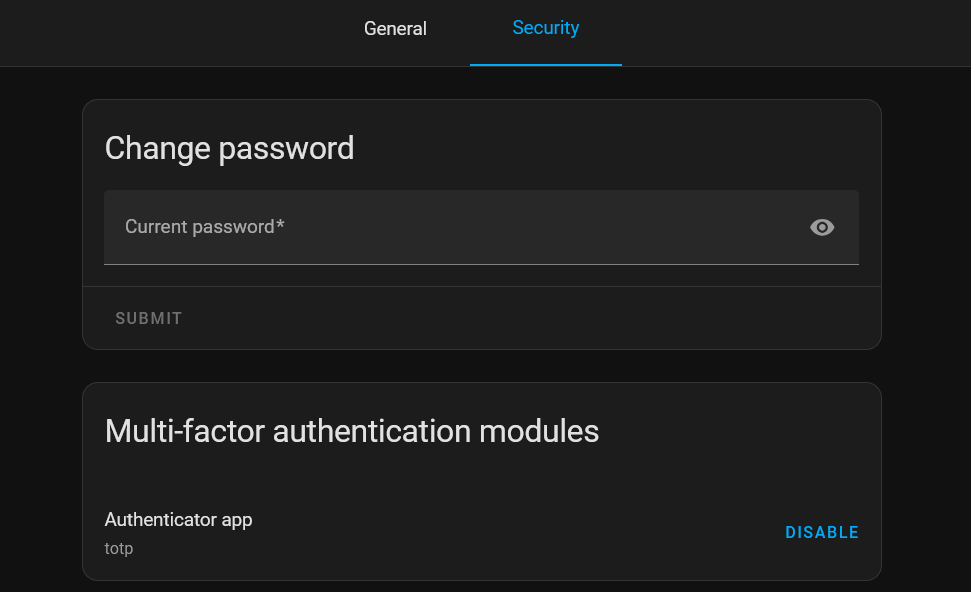
Enabling Two-Factor Authentication
Put an extra layer of security on your Home Assistant with Multi-Factor Authentication (MFA). Think of it like a double lock; even if someone grabs your password, they can’t just walk right in. Every user fiddling with your Home Assistant should slap on MFA. It’s your first line of defense against unwanted visitors.
To switch on two-factor authentication:
- Head to Profile Settings by clicking on your Username/Picture on the web browser.
- Look for the Security tab and click on it.
- Click on “Enable” under Multi Factor Authentication.
- Scan the QR Code with your MFA app and then enter the 6 digit code for confirmation.
Setting up Secure Remote Access (Nabu Casa vs. Manual DuckDNS Setup)
Want to access your smart home while you’re out of the house? Check out the options below for two secure ways to do just that.
Nabu Casa
Nabu Casa — think of it as easy mode. It’s the Home Assistant’s own subscription service. It makes sure your connection’s locked tight and access is smooth, without you needing to be a total techy. And bonus: it works with things like Google Assistant and Alexa.
Setting up Nabu Casa involves:
- Head to Settings.
- Pick Home Assistant Cloud.
- Follow the steps and let Nabu Casa do the heavy lifting.
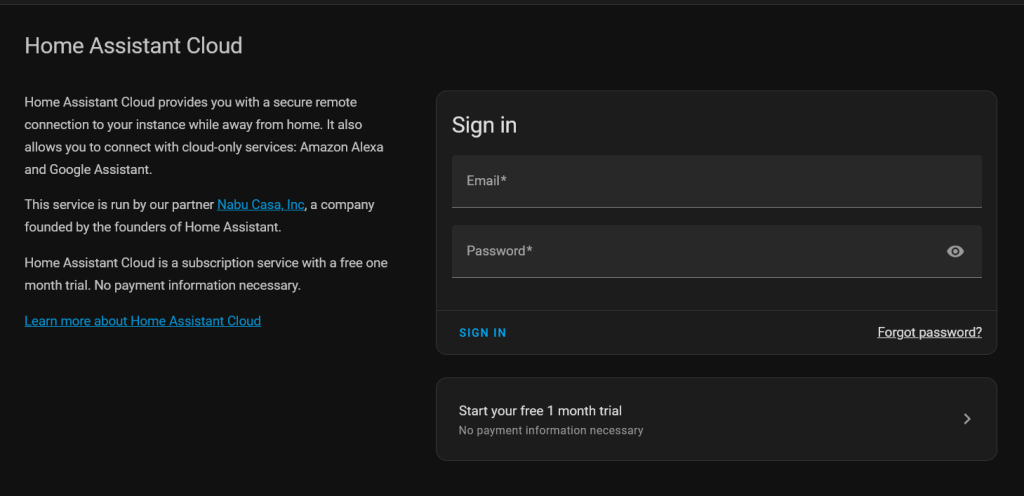
For pricing information, head over to the Nabu Casa pricing page HERE. As of February 2025, the cost is $6.50/month or $65 paid yearly.
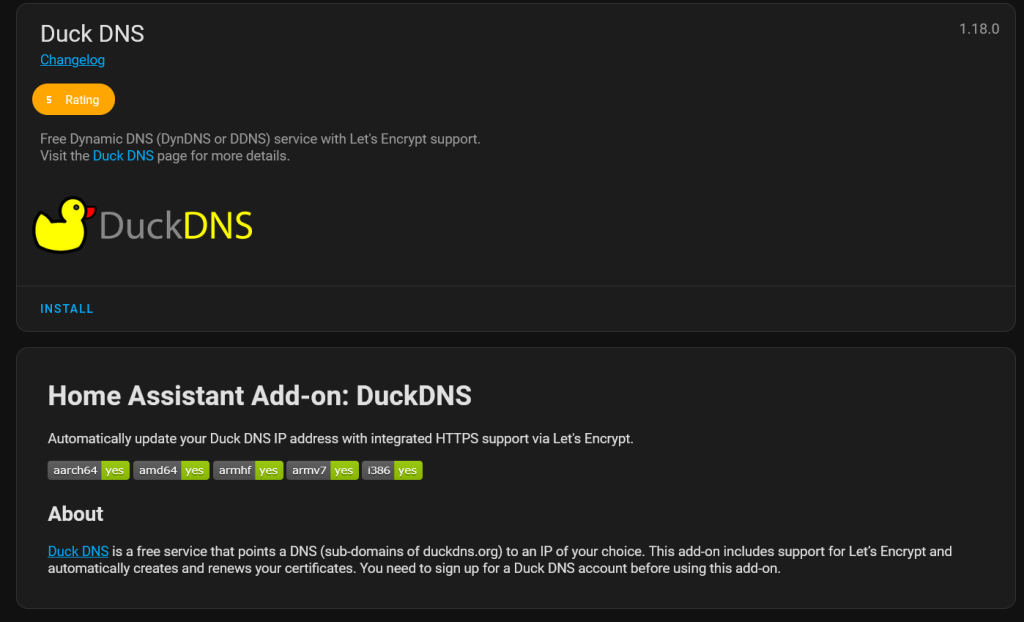
Manual DuckDNS Setup
For the DIY folks, there’s DuckDNS. A bit more elbow grease needed, but it won’t empty your pockets.
- Swing by DuckDNS to set up an account.
- Claim a subdomain.
- Install the DuckDNS add-on on your Home Assistant station.
- Let Let’s Encrypt hook you up with an SSL cert.
Best Practices for User Accounts and Permissions
User management in your Home Assistant setup is like keeping track of who’s got a spare set of keys. Here’s how you do it right:
- Make Separate User Accounts: Keep it one user, one account.
- Filter Permissions: Only give users what they must have, saving admin perks for genuine needs.
- Check Accounts Often: Flick through and tidy up user accounts and permissions now and then. Out with the inactive and outdated!
A good lookout has regular security drills. Keep everything updated, from add-ons to logs. Peek into home-assistant.log now and then to catch any sneaky problems (Home Assistant).
With these practical Home Assistant hacks, you can lock down your setup while keeping it easy to use and running smoothly.
Organize Your Dashboard for Better Usability
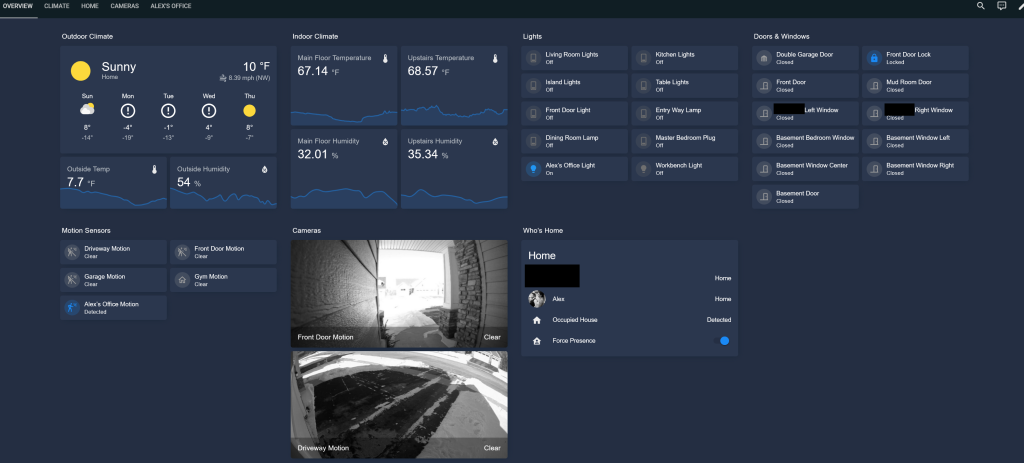
Getting your Home Assistant dashboard in shape isn’t just about making things easy on the eyes—it’s about saving your sanity as your smart home grows arms and legs. With the handy features of Lovelace UI, plus the magic of grouping entities and custom cards, you’ll whip up a no-brainer layout that makes you the boss of your own automated castle.
Using Lovelace UI Like a Pro
Lovelace UI is your front-row seat to Home Assistant’s action. Whether you want to customizable with a graphical interface or prefer getting your hands dirty with the YAML editor, there’s room for everyone’s style. If you lean towards visuals, the graphical editor presents a simple click-and-drag style much like organizing icons on your desktop.
Things you should mess around with:
- Custom Layouts: Build different views for various spots or chores—everything from your living room’s chill vibes to those kitchen antics.
- Cards: Mix and match cards like glance, entities, and fancy history-graphs to show off your smart home data.
- Themes: Spice up your dashboard’s look with different themes. Give it a make-over more often than you change the curtains.
Grouping Entities and Using Views
Kinda like organizing your kid’s toy box. Keeping entities grouped means a tidy dashboard and no brain-frying scrollathons. Bundle similar bits together with views, and hop around your controls at lightning speed.
Ways to sort stuff:
- By Zones: Group by room like the living room or kitchen. You’ll have everything at your fingertips without wandering around.
- By Job: Categorize them by what they actually do, like turning on the lights or beefing up security.
| Grouping Style | Examples |
|---|---|
| By Zone | Living Room, Kitchen, Bedroom |
| By Job Control | Lighting, Security, Climate |
Building views? It’s a breeze in the YAML editor. Just tack them under the views section in your configuration.yaml file. This method is dynamite for when your smart home setup gets big.
Adding Custom Cards for Cool Features
Custom cards are the spice to your smart dish. They pack additional features not found in the default Lovelace stack, whether you want a button to turn on your coffee maker or a gauge for the pool temperature.
Some fan-favorites:
- Button Card: Make buttons for instant tasks.
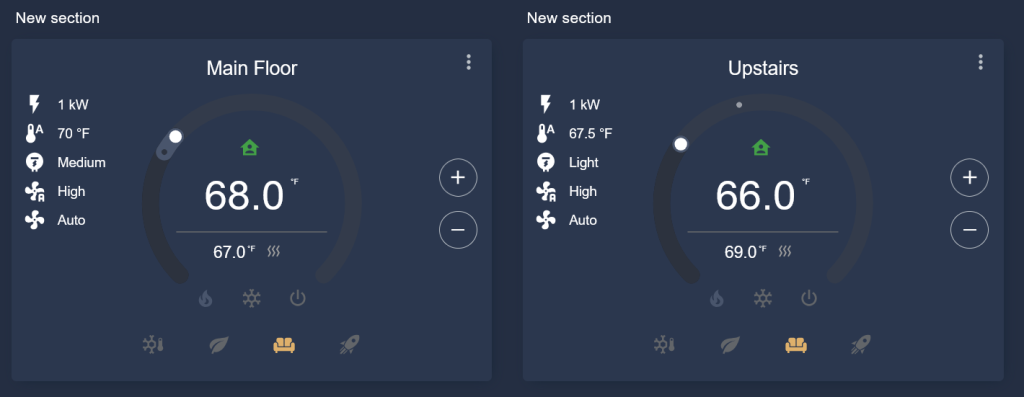
- Thermostat Card: Control your entire thermostat on a single card.
- Gauge Card: Turn sensor info into eye-catching dials.
Here’s how to setup a custom card:
- Download: Snatch the custom card’s JavaScript from GitHub or another dope source.
- Add to Resources: Pop the file into your Lovelace resources in the
configuration.yaml. - Setup: Follow the card’s guide to set it up just right on your dashboard.
For the nitty-gritty on decking out with custom cards and more, look up our piece on the beginner’s guide to home assistants.
By getting the hang of Lovelace UI, tidying up your entities, and jazzing up with custom cards, you’ll craft a Home Assistant dashboard that’s not only realistic but tailored to your daily hustle. Try these suggestions out and see what cool, beginner-friendly smart assistant features unlock for you!
Backup and Restore Your Setup
Keeping a backup of your Home Assistant setup is like your smart home’s insurance plan. Here’s why it’s a good idea and how to get it done.
Why are backups important?
Think of a backup as a safety net for your Home Assistant setup. It protects you from losing data, system hiccups, or those gremlins that show up during updates. With a backup handy, you save yourself from the headache of setting up all your gadgets from scratch.
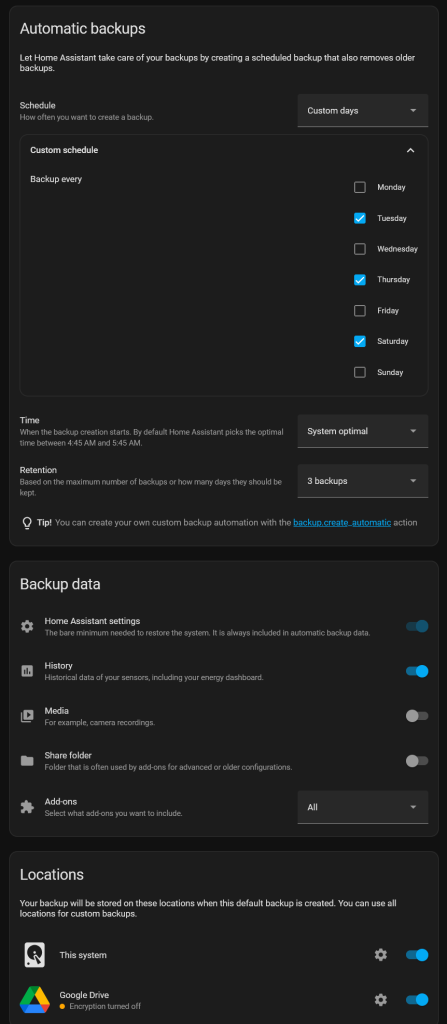
Setting up automated backups in Home Assistant
Automated backups keep copies of your setup and it all happens in the background. No manual backing up needed. Here’s the scoop on setting them up:
- Go to Settings, then click System, then Backups.
- From here you can click Configure Backup Settings.
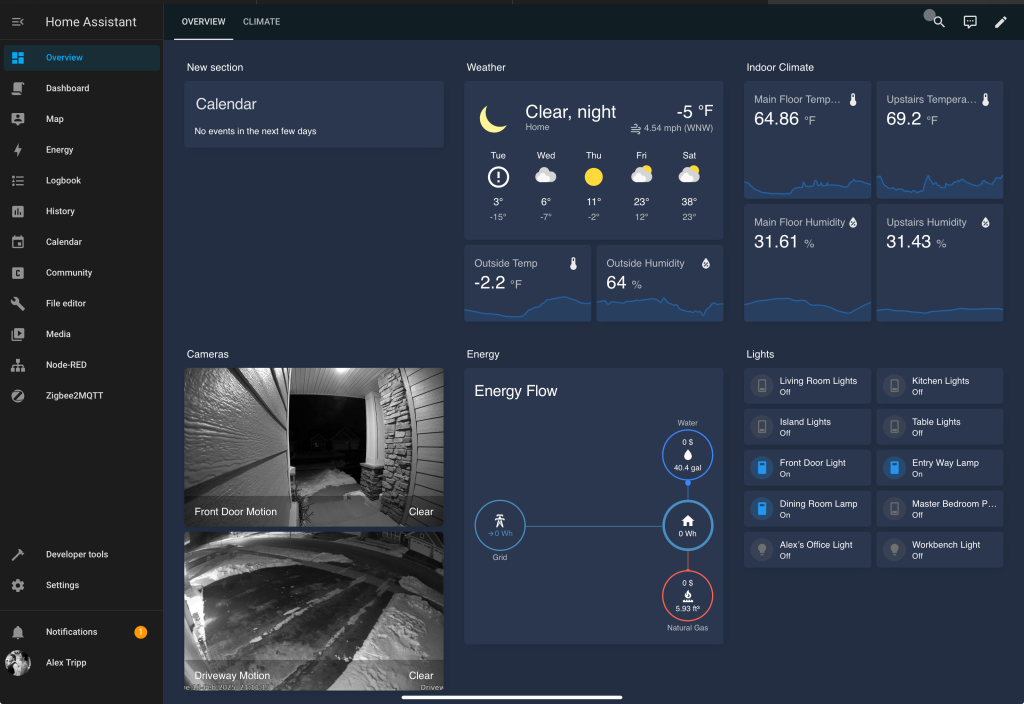
- You can setup a strategy to backup what you’d like and on what schedule and where the back ups should be stored. See below picture as an example.
How to restore a backup if something goes wrong
When tech goes rogue, restoring a backup is your rescue plan. Follow these steps to bring Home Assistant back to life (when restoring from your current system):
- Go to Settings>System>Backups.
- Select your backup from the list that you want to restore.
- Select what to restore. If you want to restore absolutely everything, select Everything.
- Select Restore.
- This could take some time. Once the restore is complete, HA will restart to apply the settings and ask you to log back in.
Making backups part of your Home Assistant routine is a smart move. You can dive into new smart home adventures knowing your setup’s got a safety net.
Final Thoughts
Recap of Key Setup Tips
Getting Home Assistant up and running can be a lot for a new user, but stick to the plan and you’ll have a smart home up and running smoothly. Here’s my “remember this” list for you:
- Pick the Right Gear: Choose a Raspberry Pi or go for a dedicated server, Raspberry Pi, or Home Assistant Green based on what suits you. An SSD is a great call over an SD card—it’s like trading a moped for a motorcycle!
- Install It Properly: Pick the best install for your hardware: use Home Assistant OS, Container, or Supervised—it’s not one-size-fits-all.
- Lock It Down: Make sure your instance is secured. Enable that two-factor authentication (MFA), get secure access via Nabu Casa or DuckDNS.
- Pimp Your Dashboard: Make your Lovelace UI dashboard easy on the eyes and handy. Group entities, throw in some views, and spice it up with custom cards if you’re feeling fancy.
- Backup and Restore: Trust me, setting up auto backups could save your butt one day. Don’t just know how to backup, but also familiarize yourself with how to roll back when needed.
Encouragement to Keep Exploring and Optimizing
Starting with Home Assistant can be a big new undertaking but don’t let it freak you out. Stick with it and you’ll soon be able to customize your home just how you like it. As you become more savvy, keep tweaking your setup. Check out forums like the Home Assistant Subreddit or the Home Assistant Forums.
The real goal here isn’t just to fire up Home Assistant—it’s to craft your own personal smart space. Whether you’re automating chores, setting up your own home security, or just lounging in a fully connected space, options are everywhere. Go on, dive in, and happy automating!